Pages

Subscribe:

20.5.12

Use a Ipad or Tablet as a computer monitor

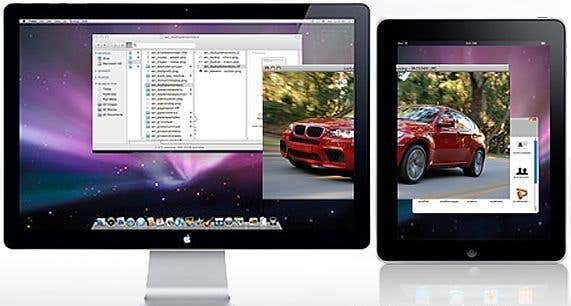
If you are an Android or Ipad tablet owner, you can setup your device as a secondary external monitor that can compliment your Mac or PC. This is a great way to add more screen real estate without having to purchase an additional monitor. It also provides a more versatile workspace.
iPad External Monitor
Setting up a tablet or ipad as a computer monitor doesn’t require jail breaking or anything like that, as there are some readily available apps in the AppStore and Google Play that make the process quite simple.

Android Tablets

Android users who want to setup their Google based tablet as an external monitor may want to consider using the following apps:
Screen Slider
Screen Slider, a software development of REDFLY, uses Wi-Fi connection technologies to allow you to pair an Android based tablet with a computer wirelessly. This app is also ultra affordable, currently priced at only $0.99 USD in Google Play. To setup the Screen Slider app, you must of course download the app to your tablet, but like most external monitor apps, you must also download a lightweight application to your computer.
REDFLY Screen Slider
This app is also offered in a pro version, which provides even more features such as additional gestures, and more display options such as dedicated mirror mode.
iDisplay
The name iDisplay might come off at first as an Apple product. However, the iDisplay app, available in Google Play, offers both Mac and PC compatibility.
iDisplay for Android
The app is currently priced a bit higher than Screen Slider, at $4.99 USD.
iDisplay of course offers basic monitor extension, but some other notable features offered by the app are zoom options, gestures, and support for different display modes such as portrait and landscape.

iPad

iPhone users who want to setup their Apple based tablet as an external monitor may want to consider using the following apps:
Air Display
Want to use your new iPad’s crisp, Retina Display as a computer monitor? Air Display is a $9.99 USD application that is available for download in the Apple AppStore.
Air Display
Advertised as being compatible with Mac & Windows computing environments, Air Display is a full featured monitor app that not only adds a monitor to your setup, but also offers a wide range of features that allow for on-screen/touch screen productivity support.
You can draw and input directly on the iPad even when being used in monitor mode. Alternatively, convenience features such as Auto-rotate make this one of the more versatile apps on the list.
DisplayPad
DisplayPad is a one of the more highly reviewed apps that we’ve covered on this list thus far. Currently, it’s available in the AppStore for $2.99 USD.
DisplayPad App
This app of course offers the basic feature of turning an iPad into a secondary monitor. However, it also, notably, offers some other distinctive features also:
• Tap your iPad to click.
• Two finger tap to right click.
• Two finger drag to scroll, just like on a laptop trackpad.
• Rotate the screen and DisplayPad automatically changes the mode of the display.
• Position the display anywhere relative to your desktop, just like an external display.
Thank you for stopping by the site for today’s post, which provides four options for using a tablet or iPad as a monitor. If any of our site visitors have any other apps that they recommend over these, for either iPad or Android based applications, feel free to link to them in the comments section.

Watch blocked videos on Youtube already blocked

All are want to watch a YouTube video that has country restrictions in place? Alternatively, want to watch a YouTube video that is marked with a copyright block? YouTube often times places restrictions on their video content, which is appropriate in some cases; but other times, it may be unneeded. In today’s post, we will review how you can bypass some YouTube restrictions.
YouTube Video Not Available in Country
There are a few ways to do this, and many websites recommend simply using a proxy server to queue a different location in order to bypass country restricted YouTube content. For example, if a YouTube video is restricted in India, you could simply use a proxy to set your IP address to a different country. However, if you have ever used a proxy, you may have experienced that many proxies are a bit slow, making them non-ideal for viewing video content. Alternatively, here’s a fast proxy service.
A better and simpler way to bypass some restricted YouTube content is to use a web browser add-on.
YouTube Unblocker Extension
Start by jumping to the plugin page and installing the plugin just as you would any other browser extension. You may need to restart your browser upon successful install.
This plugin works automatically, so there is little to no configuration needed. Now, when you try to view a restricted YouTube video, you will be presented with the following prompt:
YouTube Unblocker
The plugin automatically initializes when you visit a restricted video and attempts to bypass/unblock the video.
Upon doing some testing with this plugin, I found that it is not perfect, but it does work for many videos, depending what you are trying to unblock. For example, as far as country restricted videos, the plugin does work as advertised and does a nice job. As noted by the plugin’s description, it uses the following method to loophole the country restrictions, which is a better option than a direct proxy:
Unblock Country YouTube Videos Description
However, when browsing some restricted content, the plugin was unable to retrieve the video. For example, some YouTube videos that have been completely removed and that are no longer available could not be retrieved with this plugin.
As far as copyright “temporarily blocked” content and country restricted content, this plugin seems to work fairly okay.
Thank you for stopping by the site for today’s post which offers a method for viewing blocked YouTube content the easy way. If any of our site visitors have any tips regarding other methods for getting around YouTube video restrictions, feel free to leave a comment.

How to format external harddrive to FAT32

Trying to format a large external USB or Firewire hard drive to the FAT32 file system? Can’t do it? Only see an option for formatting the drive using the NTFS file format? Well if you answered yes any of those questions, then you’re at the right place.
I was recently trying to format my 1 TB MyBook external hard drive in Windows XP to FAT32 instead of the overly forced-upon NTFS format. Why? Well because I needed to connect it to a NAS device and the NTFS permissions were causing the NAS not to be able to access the drive. Simple solution is to use FAT32, no security, no problems. Though it’s sometimes useful to format a USB drive in NTFS format. 
Also, formatting a drive in FAT or FAT32 will allow it to be read by other operating systems, such as Mac, Linux, and older versions of Windows such as Windows 98.
Unfortunately, Windows XP and Windows Server 2003 will only format a removable drive in FAT32 if it’s less than 32GB! Hmmm…that pretty much cuts out ALL modern external hard drives!
However, Windows can format a drive that is larger than 32GB in FAT32, but you have to use the DOS command prompt. However, if you have a drive that is 1TB or larger, you may still get an error saying “The volume is too big for FAT32”.
In that case, you can use a free program called SwissKnife that will allow you to format an external hard drive that is up to 2TB in size. Let’s go through both methods. In case you are having problems getting your external hard drive to show up in Windows, read my article on how to change the drive letter for an external drive in Windows.

Format external drive in FAT32 using DOS

Open a command window by going to Start, then Run and typing in CMD.
command prompt
Now type in the following command at the prompt:
format /FS:FAT32 X:
Replace the letter X with the letter of your external hard drive in Windows. Windows will go ahead and begin formatting the drive in FAT32!
format external hard drive fat32

Format external hard drive in FAT32 using SwissKnife

SwissKnife is a nifty little program that is completely free and that you can use to format many types of external drives such as USB, Firewire, PCMIA, SATA and SCSI. You can also use it to create partitions on an external hard drive and it formats faster than Windows.
swissknife
So next time you want to format a hard drive in FAT32 and Windows only gives you an option for NTFS, make sure to follow one of the two method mentioned above. Enjoy!
And plz hit thanks and share with your friends

know more about Google Bookmariking

People are always using bookmarking option in the browser. Using it they are bookmarking their favorite sites, so that they can open it later, no need to find them again. How about having the same thing with more features?
We all knew that Google is quite popular for their good products. Google is also having product related to bookmarking our sites with many good features. Check out below link.
This is quite good concept from the Google. Here you can add unlimited bookmarks of your favorite websites with particular category and description. Just click on Add bookmark button from the left menu and you can easily add your sites with all description like below.
After adding you will get your sites lists like below image.
From this list you can easily sort your bookmark list with different available filters. You can also search your added sites quite easily. If you want to export your sites list then there is button on left menu. Using that button we can easily export our list of sites on the html page.
How it can be beneficial?
With this feature you can easily bookmark unlimited sites in it. Also you can easily find-out about them. In different browser we having different bookmark list but here that will be not problem. You can have your same bookmark list on any browser. It is not limited to your own computer; you will get it on any computer using your Google Account. It is like our bookmarking page moving with us. Isn’t it great? I know it can be beneficial in many ways.

How to know the Airtel mobile number ?


Dear Airtel users here is  the Good trick  for knowing your mobile number by simply dialing following number
                                                                  *282#
 
Please say thanks to my posts

19.5.12

How To Send Gmail Attachments To Google Drive?


save attachment in Google-DriveThere was a time when people had to wait for large attachments of important E-mails to be first downloaded and then were needed to be saved manually, delaying the actual purpose of the mail. Similarly, attaching the files to the mails with Hotmail and even Yahoo were never that quick to keep the pace fast, often resulting in severe irritation. Noticing these consumer crises, it was the great-Google that planned up a solution. Think about a scenario where all your attachments within the mail would automatically be saved to your own customized folders, by simply adding a label to it. With Google Drive, it is possible.
The feature that makes it unique enough to be appreciated is the fact that you can synchronize your Google Drive with your desktop, making an automatically update in your local drive each time your attachment moves to your folder in Google Drive. This means that you can always keep a track of your attached documents even offline via your local drives.

Google Drive was grabbing huge audience even before it launch and it has taken up the market largely since the day it has appeared on screen that is a few days back. Google drive provides it users a cloud storage up to 5GB. If you have a dropbox account then you can also move your customized folders from your Google Sky Drive to your Dropbox. All you need to take the advantage of this wonderful launch of Google is to download a Google Chrome extension, formally known as Gmail Attachment to Drive which will enable you to save all your Gmail attachments from your account to your cloud storage, also allowing you to save Documents without worrying about the type of file.
google drives
Installing the extension will add an option to your mail to “save the file to Google Drive”. You can save all your attachments by simply clicking on this option. Initially the files are saved on the main folder but you can always customize your attachments by classifying them in different folders.

Get Your Attachments in One Place

If you are still not using the Google Drive and the idea sounds reasonable enough to spend your 5 minutes, then here are simple, short steps to add it on your account
1. Login to your Google Account and get into the mail box. at the moment there will be no option of “save to drive”.
2. You need to click here now to create a new copy of this spreadsheet in your Google Drive
3. Gmail menu will appear on the screen. Click on initialize and go on with permissions following instructions that suit you the most.
4. Go back to the menu and select Run.
5. You are done.

Are you Curious to know? This is what happens

There is no magic behind this automatic saving of attached files from your mails to your Google Drive. In fact it’s a mechanism. The Google sheet that you can create by following the link above, monitors all your mails in your Gmail Account, it updates itself after every two minutes and the moment it finds a message carrying a label Google Drive, it automatically will save all the attachments of that message. The transferred attachments can be accessed by the Google drive folder as well as to the local drive location that you associate with it.

Helpful Tips in case of possible Troubles

There are chances that you might land up with many errors due to the short intervals between the monitoring times of your inbox, which is as default is two minutes. errors like, Service invoked too many times, often becomes to frustrating especially when you need to hurry for mailing something urgent. The solution to get out of this is to increase the trigger time so that the sheet in Google Docs will monitor your mailbox after every five or say ten minutes. To edit the settings, open up your sheet and go to Tools. Click on Script Editor and then select resources. Click on current script triggers and change the minute timer from two to somewhere around 5 minutes to Ten minutes.
Although SkyDrive offers its users a large storage up to 7GB which is quite satisfactory as compared to 5gb of Google Drive but one point that has given the privilege to the Google drive is that the maximum file size in skyDrive is only 2GB where as you can save your files up to 10GB.Moreover this additional feature of automatically  saving the attached files is something users were waiting since a long time.
keep your mails classified, enjoy GoogleDrive,

Important Crispy Tips To Write Optimized Blog Post Title


                                   optimize your title                                                                                             Title is the most crucial part of a blog's overall structure. It can either construct or demolish our entire post. Selecting an ideal title may become complicated if we don’t concentrate on accurate strategies. Every blogger wants his post title to be enriched with rich keywords words so his readers can taste the sweetest part of the blog. Generally a post title represents whole content in small peace of words. A post title not only enhances our blog but also has some significance towards SEO.
Writing an optimized  blog post title is becoming a problem for nearly every blogger. The prime reason behind it is lack of proper guidance. Today we will learn about some practical Top 10 Tips To Write a Perfect Blog Post Title.

Do Post Titles Make Difference to SERPs?

SERPs stands for Search Engine Results Page. More than 95% of Google users look for a query on the first page and no one bothers clicking the next button to see results on the next page. So as long as you are on the first page, organic traffic will prove a blessing. Title plays vital role in bringing traffic to your blog. Major traffic is based on post titles and then comes the content. When Bots crawl a blog they look for all the relevant data inside the post i.e. Title, Descriptions, Bold keywords, headlines and all image tags. So everything counts and only an optimized blogpost will let you survive on Google's first page.

1. The Simple You Write The Better It Gets:

write simpleWe should use most common keywords in our titles to increase our chances of getting a boost in our traffic, but if we select an irrational (illogical) post title then this will not only affect our SEO but also misguide our readers. We should keep in our mind our main intend is to provide quality information to our readers so instead of writing crazy titles we should keep it simple, and Google loves simplicity.

2. Writing Purposeful Post Titles:

make your posts relevant
We create posts on our blog to entertain our readers the situations gets worse when we start thinking about our self and become selfish. Our readers trust us with closed eyes so it’s our duty to provide them with accurate information. What if we create a post about Apple and we named the title of the post to Mango then the reader who is searching about Mangos will land in a place which he never searched, and hence due to our silliness we will lose a loyal reader. So we should keep our aspiration aside and think about our audience and moreover we should select the titles according to the content of our posts.

3. Make Descriptive Post Titles:

Title gives an idea to our reader what this post is all about, it gives basic knowledge to our readers about the topic which is covered in our post. So we should select a title which clearly tells our reader about our content. We can use creative keywords to make our title unique from other, but we should keep our title within 75 characters.

4. Use Synonyms to Make Your Post Title Unique From Others:

synonyms
Commonly while selecting our post titles we often perform a search to check whether the keywords which we will use in our title is not taken by someone else, and mostly after searching we come to the conclusions that the keywords are already in use. So in this situation we don’t need to be over exhausted instead we can use a grammatical technique which will give us the same meaning keywords with different words, yes I am talking about synonyms. Basically synonyms are those words which are almost identical or similar in meaning for example, Instead of Creative we can use Artistic, and by using synonyms we are targeting the same content but with different keywords.
  • If you are using Microsoft Word then you can select synonyms very easily and effectively. To select a synonym
  • Open Ms Office.
  • Now just paste the title of your post.
  • After pasting the title just right click on that word which you want to change.
  • After pressing right click a drop down menu will be opened and then place your mouse cursor over synonyms.
choose synonyms in ms office
  • And here you will see a list of different words with same meaning now select the keyword for your title which suits perfectly your post.

5. Make Your Title Short – List only Important Keywords:

Try to use small but smart titles, by writing small post titles we are realizing the Search engine bots that we only offers specific niche content this is the reason why we maintain quality in our posts. Try to make your titles as short as possible and make sure you never exceed 75 (words) character limits. To maintain quality we recommend you to use 60 characters in your each post title.

6. Using Trendy Words in Post Titles:

Try to use trendy words in your post title to grab the attention of the readers this will not only increase your traffic but will also play important role towards building your audience. People want "Hot"  Latest topics. But still we need to use those trendy keywords which are related to our niche and it should be related to our content.

7. Using Important Keywords in Post Titles:

rich keywords in title
Now this tip is the most important one, Keywords play crucial role towards building audience so you must select your post keywords carefully. As I mention previously keywords present in post title determine how much traffic you will get, the better you select the more traffic you will get. Just search for most relevant keyword and if it matches your content then hit enter and enjoy the fruits of keywords.

8. Using Eye Catching Words

Mostly users look for those articles or content which are the best in the market for example, if we buy a fruit from a shop keeper we always make sure it is of superior quality. In the same way our reader only want to read those content which are of best quality so by using keywords like HOT,  Best, perfect, good, excellent we are indicating people it’s worth checking it.

9. Creating Questionable Post Titles:

questionable titlesThe world of vocabulary is really huge, we can select numberless expressions for our titles and with the same technique creating questionable titles is the most effective way to get noticed and grab attention of readers. For instance using How, What, How To, in our post titles


10. Be Unique Be the one – Rule the SEO

Google loves uniqueness no matter it is your content or title, unique titles has always proved it self important. Due to unique title we obtain high rank in SERP and hence this will not only increase our traffic but also has great impact in SEO.
So that’s how we can select perfect post titles for our blog and websites. In addition Post titles are the heart of our content so a silly mistake could break our entire post. And if we adopt these instructions we will surely see a huge increase in our traffic. So that’s it for now guys till then Peace, Blessings, and Happy writing. :)

Free Web Tools To Create Favicon For Your Website

Create your own favicon
Every big website has an icon or image associated with it. This is what makes the website unique and gives it its identity. Look at Facebook. It has the 'f' icon, which is immediately recognizable. Google has the 'g' icon, and so on. These icons are displayed on browser tabs right next to the page title, and are known as favicons. In essence, these favicons are a means of branding your blog. Every blog or website needs to have a brand. Without a brand, a blog has no credibility. It's a small, but essential step you need to take. In fact, it is one of the first steps you need to take when you start a blog or website.

You might think these icons appear automatically or something, but they don't. You need to manually create a favicon from your logo, and then add it into your template. Luckily, there are tonnes of tools that can help you create a favicon for your site. So here goes an insanely huge list of many such tools! :).

Lets you create your own favicons. You ave to upload an image file and choose the size, and this tool will do the rest. You can download the icon to your computer. This site also have a gallery of some of the favicons made by others.

2. Animated Favicon

This is a great and interesting favicon tool. Instead of the traditional .ico icons, it makes .gif icons for you, which can be animated. Just visit the site to check it out!

3. Photoshop Tutorial

If you are a Photoshop fan like me, then you'll definitely want to check this out. This is a tutorial on creating favicons in Photoshop. You can create favicons right on your computer if you have Photoshop installed. 

4. Favicon Maker v1

This again is a simple favicon editor that lets you create your own favicons from the ground up. The best thing about it is, there are no ads on the site, and no extra stuff. So there's no distracting stuff that can bog down a website.

5. Dynamic Drive

Not a favicon-ish name, but it will do the job. It also lets you upload images to create favicon from. And it gives you instructions as well! You can also add this tool on your own site by pasting a code.

6. iConvert

Now here's an idea I like. This tool is unique in the sense that it creates icons for Windows, Mac, and Linux, all in a single step!

7. GenFavicon

One of the best favicon tools. It is really easy to use. Just upload your image, and you can cut, crop and preview it. You can then convert it into a favicon, ready to be used with your site.

8. Online Icon Maker

Another great icon pixel editor. It has the looks of a professional icon maker. It gives a wide ranger of colors to choose from to fill in your pixels. This is the first such tool I ever used.

9. Convertico

Convertico lets you upload images to convert to favicons. You can also provide a URL to the image you want to use. It is also one of the best favicon tools out there.

10. Favicon.ru

Pretty much the same as the others. But I've noticed that it's faster, and it generates favicons more quickly. I may be wrong, though.

11. Favicon Editor v0.03

Now here's where creativity comes in. This tool doesn't take images from you and converts them into icons. I has a simple pixel editor that lets you create a favicon from scratch!

12. Degreave Favicon Generator

This one is a my favorite. It lets me generate favicons in two way, from images and from the pixel editor. It has a wide range of colors you can choose from for your pixels. It's really cool!

13. Favicon Generator

Not a very attractive one to look at, but this definitely is a very useful tool. It explains what a favicon is, and how to use it on your website. I recommend you use this tool!

14. Favicon editor

This is just a simple favicon pixel-by-pixel editor. Throw in 16 million colors though, and you have yourself quite a treat! This is one of the few editors that offers the complete set of RGB colors.

15. Web Script Lab Favicon Generator

Although it is a simple uploaded-image converter tool, there are some small, but pretty useful tools from Web Script Lab you might find useful.

16. Converticon

One of the easiest and most simple tools available. It guides you through the process, and makes you upload an image to convert into an icon. It has many icon resolutions to choose from.

17. Favicon.cc

A nice favicon tool that also provides 16 million colors, and gives you the option to import an image. It also has features like latest favicons, top rated favicons etc.

18. Faviconr

Simple tool that creates favicon from an image that you supply

19. Favikon

Here's a neat little tool. It asks you to upload an image, and then shows you the generated favicon so you can see how it looks. You can then download it in .ico or .png formats.

20. Favicon Japan

This is a simple image converting tool, but it is in the Japanese language.

21. Favicon Tool

This one again isn't in English. But it sure is very helpful to me. It's an editor, and lets me enter RGB values manually! It also offers 16 million colors, with many color profiles. Best of all, when I select a shade, it tells me the corresponding RGB values, so I can use them in future.

22. Favicon Generator

This is one of the simplest favicon editor, and one of the easiest one to use. It is also a pixel-by-pixel editor.

23. Favicon Drawing tool

As the name suggests, this is a favicon drawing tool and it has many color to choose from

24. Favicon Generator

Image converting tool. It also gives you instructions on how to use favicons.

25. 256 Pixels

This is pretty much like the other favicon tools. But despite what the name says, it actually provides 16M colors for you to work with.

26. HTML Kit Favicon

Simple image converting tool

27. Buddy Icon

This tool lets you add your own icon to instant messengers, bulleting boards and other places that accept custom icons.

28. Favicon Tool

Convert images into icons, and learn about what favicons actually are and their advantages.

29. Favicon Factory

Simple image converting tool

30. Iconfu

 Simple, but easy to use favicon editor